
Custom Files enables you to add your own files to the project. Basically, a custom file is a blank page with the layout of the project for you to add your own content so it will have a consistent look and feel like other generated files.
How to Use
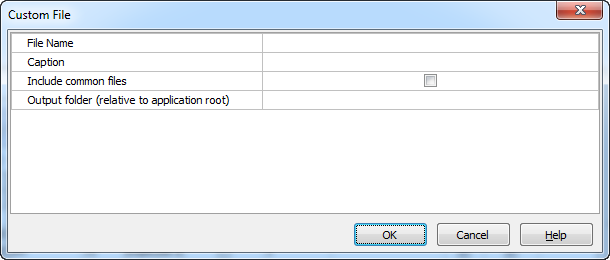
To create a Custom File, simply right click the database pane or click Edit in the main menu, then select Add File, the following form will show:

The properties are as follows:
| File Name | File name with extension. Notes
|
| Caption | The caption of the page. This is similar to table caption for a table and will be shown up in the menu and in the Breadcrumbs of the page. |
| Includes common files | For .php file only. Specify whether to include the common files (mainly header, menu and footer) in the file so it will be consistent with other generated scripts and able to use PHPMaker classes and functions. |
| Output folder (relative to application root) | The output folder of the page. This must be relative to application root of the project (see Generate Settings). For example, if you have set up a website like: Application root folder: C:\Users\Administrator\Documents\mycompany.com Destination folder: C:\Users\Administrator\Documents\mycompany.com\project1 and you want to generate your Custom File in the destination folder, you should enter "project1/" (no quotes). Note Do NOT use parent path ".." or the file will be generated outside the application root leading to some unexpected results. |
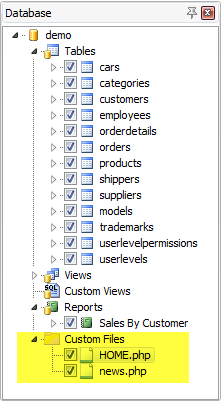
After entering above properties, click OK button to save. The Custom File will show up in the database pane under the Custom Files node:

To edit the Custom File properties, right click the Custom File in the database pane and select Edit File.
To delete a Custom File, right click the Custom File in the database pane and select Delete File.
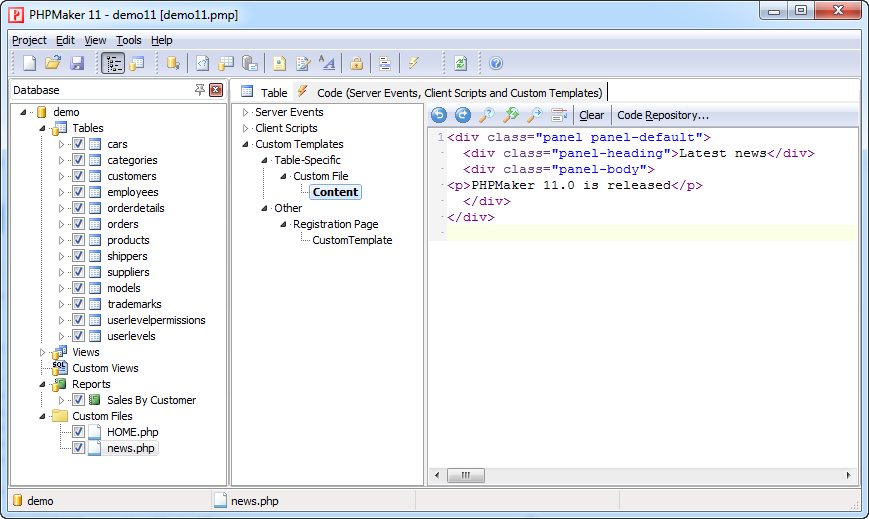
To enter content for the file, select the Custom File in the database pane , then select the Code tab (which contains Server Events, Client Scripts and Custom Templates) in the right pane.
Scroll down the treeview or collapse the Server Events and Client Scripts node, select the Custom Templates -> Table-Specific -> Custom File -> Content node, then you can enter or paste your content in the editor:

Then just save your project generate and run your scripts in your browser as usual.
Examples
Example 1 - Include an external file instead of saving the page content in the project.
<?php include_once "MyPage.php"; // Includes an external file ?>
Example 2 - Add a Bootstrap Panel in the page to show some news.
<div class="panel panel-default">
<div class="panel-heading">Latest news</div>
<div class="panel-body">
<p>PHPMaker 2019 is released</p>
</div>
</div>
The result:

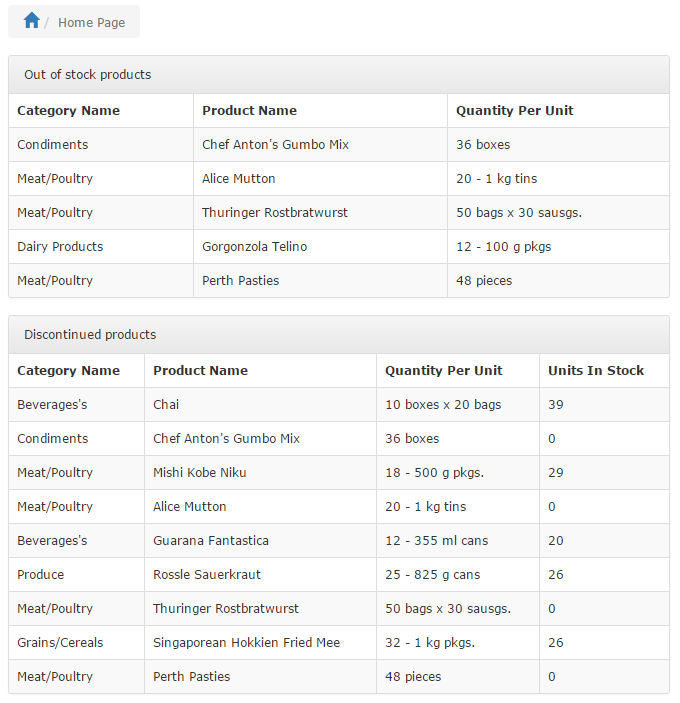
Example 3 - Add multiple Bootstrap Panels in the page as a dashboard page. Use database helper to execute SQLs and display data as HTML table.
<?php
$db =& DbHelper(); // Create instance of the database helper class by DbHelper() (for main database) or DbHelper("<dbname>") (for linked databases) where <dbname> is database variable name
?>
<div class="panel panel-default">
<div class="panel-heading">Out of stock products</div>
<?php
$sql = "SELECT DISTINCT " .
"`categories`.`CategoryName` AS `CategoryName`," .
"`products`.`ProductName` AS `ProductName`," .
"`products`.`QuantityPerUnit` AS `QuantityPerUnit`" .
" FROM `categories` JOIN `products` ON (`categories`.`CategoryID` = `products`.`CategoryID`)" .
" WHERE " .
"`products`.`UnitsInStock` <= 0";
echo $db->ExecuteHtml($sql, ["fieldcaption" => TRUE, "tablename" => ["products", "categories"]]); // Execute a SQL and show as HTML table
?>
</div>
<div class="panel panel-default">
<div class="panel-heading">Discontinued products</div>
<?php
$sql = "SELECT DISTINCT " .
"`categories`.`CategoryName` AS `CategoryName`," .
"`products`.`ProductName` AS `ProductName`," .
"`products`.`QuantityPerUnit` AS `QuantityPerUnit`," .
"`products`.`UnitsInStock` AS `UnitsInStock`" .
" FROM `categories` JOIN `products` ON (`categories`.`CategoryID` = `products`.`CategoryID`)" .
" WHERE " .
"`products`.`Discontinued` = '1'";
echo $db->ExecuteHtml($sql, ["fieldcaption" => TRUE, "tablename" => ["products", "categories"]]); // Execute a SQL and show as HTML table
?>
</div>
The result:

Note Other than ExecuteHtml(), there are a few other useful methods in the database helper class, refer to the source code of the file ewdb.php in the template for details. You can also extend the database helper class (e.g. in server side Global Code, see Server Events and Client Scripts) and add your own methods.